horse bit guide

Horse Bit Guide⁚ An Overview

Horse bits are essential tools for communication between rider and horse, influencing movement through pressure.
Selecting the right bit requires understanding bit mechanics,
various designs, and considering both horse sensitivity and rider experience for effective communication.

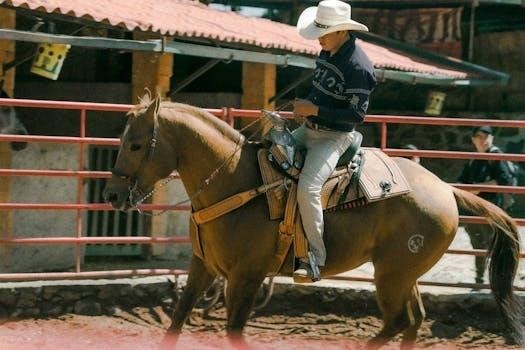
Horse bits are fundamental pieces of equipment used in riding and training, fitting into the horse’s mouth to provide control and communication. The bit exerts force inside the horse’s mouth, influencing behavior and movement when the rider applies pressure through the reins. Bits come in various shapes and designs, and what suits one horse won’t necessarily work for another.
Understanding how a bit functions is vital before using it. The basic families of bits are defined by whether they use leverage. The three main types of horse bits are snaffle, curb, and combination. However, there are many variations within each type.

Understanding Bit Mechanics

Understanding bit mechanics is crucial for effective communication. Bits apply pressure to specific points in the horse’s mouth.
Different bit designs and types affect these pressure points uniquely, influencing the horse’s response to the rider’s aids.

How Bits Work⁚ Pressure and Communication

Bits function by applying pressure to the horse’s mouth, tongue, and bars, facilitating communication between rider and horse.
The bit’s design determines where and how pressure is distributed, influencing the horse’s response.
Snaffle bits apply direct pressure, while curb bits utilize leverage.
Understanding these pressure points is crucial for effective and humane horsemanship.
A bit isn’t designed to control the horse, but to communicate the rider’s wishes.
The horse responds instinctively to the pressure on the bars of the mouth.
The bit works with the reins to apply this pressure, and in the case of curb bits, with the bridle.
The idea is that the bit applies subtle pressure to the bars of the mouth, which are made of sensitive cartilage.

Snaffle vs. Curb Bits⁚ Key Differences

The fundamental difference between snaffle and curb bits lies in their action and the pressure points they affect.
Snaffle bits apply direct pressure to the horse’s tongue, bars, and corners of the mouth.
Curb bits, however, utilize leverage via shanks, exerting pressure not only on the mouth but also on the poll and chin groove, often with the aid of a curb chain.
Snaffles are generally considered milder, promoting direct communication, while curb bits offer more control through increased pressure and leverage.
Snaffle bits use a bit ring at the bit mouthpiece to apply direct pressure.
Curb bits use a type of lever, called cheeks, instead of bit rings.

Types of Snaffle Bits

Snaffle bits are popular due to their mild action and simple design.
They apply direct pressure, offering various mouthpieces like single-jointed, twisted, or mullen mouth.
Different ring types further customize the bit’s action.

Common Snaffle Bit Designs and Their Uses

Snaffle bits, widely used in English riding, feature diverse designs catering to varying horse sensitivities and training levels.
The D-ring snaffle offers stability, while the O-ring snaffle provides quicker response.
Eggbutt snaffles prevent pinching, enhancing comfort.
Full cheek snaffles aid in steering, especially for young horses.
Mouthpieces range from single-jointed, applying tongue and bar pressure, to mullen mouth, offering gentler, even pressure.
Twisted mouthpieces increase severity.
Snaffles are selected based on the desired level of control and the horse’s responsiveness, making understanding these nuances crucial for effective communication.

Types of Curb Bits

Curb bits utilize leverage, employing shanks to apply pressure to the mouth, poll, and chin.
These bits offer increased control, often used in Western riding and advanced disciplines requiring nuanced communication and refined cues.

Understanding Leverage and Curb Chain Action

Curb bits function through leverage, using shanks to amplify rein pressure.
The curb chain or strap, positioned under the horse’s chin, plays a critical role in this mechanism.
When the reins are engaged, the shank rotates, tightening the curb chain.
This action applies pressure to the chin groove, poll (via the bridle), and the horse’s mouth.
The severity of the curb bit’s action is influenced by shank length, curb chain tightness, and rein pressure.
Longer shanks increase leverage, resulting in a stronger response.
A properly adjusted curb chain ensures even pressure distribution, preventing discomfort or injury.
Understanding these elements is essential for effective and humane use.

Pelham Bits⁚ A Specialized Curb Bit

Pelham bits offer a unique combination of snaffle and curb actions.
They feature a single mouthpiece with two rein attachments, allowing riders to apply direct and leverage pressure simultaneously.
A curb chain is used to enhance leverage.
The Pelham is used with two reins, or rein converters.
This design is versatile, making it suitable for horses that need a blend of control and responsiveness.
Pelhams are often seen in hunter disciplines.
They don’t apply pressure to the poll, making them suitable for sensitive horses.
Riders can choose between different mouthpieces, like the mullen.
The Pelham bit allows you to have both reins or use one.

Combination Bits

Combination bits merge the actions of snaffle and curb bits, offering nuanced control.
They often incorporate a hackamore with a mouthpiece.
These bits allow riders to influence different areas of the horse’s mouth and head.

Combining Snaffle and Curb Actions

Combination bits offer a unique approach by merging the direct pressure of a snaffle with the leverage action of a curb bit. These bits often feature a mouthpiece, such as a snaffle, combined with shanks and a curb chain or strap. This design allows the rider to engage different pressure points on the horse’s head, providing more nuanced communication.

The gag bit, frequently seen in English disciplines, exemplifies this combination. By integrating diverse mouthpieces and cheek pieces, riders can achieve a wide array of control options. Combination bits are typically employed at higher levels of riding, demanding a skilled and experienced rider.

Bit Components Explained

Understanding the various parts of a horse bit is crucial for effective communication. Key components include the mouthpiece, which comes in diverse materials and designs, and the cheeks, shanks, and rings, each with specific functionalities impacting control.

Mouthpiece Materials and Designs

The mouthpiece of a bit significantly impacts a horse’s comfort and response. Materials vary widely, including metal, rubber, and plastic, each affecting salivation and sensitivity. Metal mouthpieces can be plain or feature rollers of stainless steel and copper. For sensitive mouths, options include vulcanized rubber, apple-scented plastic, or sweet iron.

Designs range from straight bars to jointed versions, with or without ports. Ports are inverted U-shapes that offer tongue relief. The choice of material and design should prioritize the horse’s comfort, encouraging salivation and responsiveness to the rider’s cues. Different designs give control of the horse.

Cheeks, Shanks, and Rings⁚ Functionality

Cheeks, shanks, and rings are crucial components influencing bit action. Snaffle bits typically feature rings for direct pressure on the mouth. Curb bits utilize cheeks and shanks to apply leverage. Shank length affects control; longer shanks offer more leverage. The purchase, located above the mouthpiece, connects to the bridle and influences bit speed.

A short purchase reacts quickly, while a long purchase is slower. The curb chain, attached to the purchase, reduces poll pressure. These elements work together to facilitate communication between rider and horse, impacting pressure distribution and control. Each element influences the pressure applied.

Measuring for the Correct Bit Size

Accurate bit sizing is vital for horse comfort and performance; Methods include using a bit sizer, string, or calipers. A properly sized bit prevents pinching or rubbing, ensuring effective communication and control during rides.

Methods for Accurate Bit Sizing

Achieving the correct bit size is crucial for your horse’s comfort and your control. Several methods ensure accurate measurements. Ideally, use an old bit as a guide. If unavailable, a bit sizer offers a precise measurement by placing it in the horse’s mouth and noting the width.
Alternatively, use a string or dowel, marking the mouth’s sides and measuring the distance. For frequent measurements, calipers provide a quick, accurate solution.
If an exact size isn’t available, opt for a slightly larger bit and use bit guards to prevent pinching and ensure proper positioning.

Choosing the Right Bit

Selecting the correct bit involves considering horse sensitivity and rider experience. Begin with a milder bit and adjust if necessary. Prioritize proper fit to avoid discomfort or injury, ensuring effective communication and control.

Considering Horse Sensitivity and Rider Experience

When choosing a bit, consider both the horse’s sensitivity and the rider’s experience. A less experienced rider should start with a milder bit, like a snaffle, to avoid inadvertently causing discomfort or confusion. Observe your horse’s reactions to the bit; signs of resistance or discomfort indicate a need for adjustment. A sensitive horse may benefit from a bit made of softer materials like rubber or sweet iron.

Remember that communication is key, and the bit should facilitate a clear and gentle connection between horse and rider. Seek guidance from a trainer for tailored recommendations.

In-Hand Bits

In-hand bits are specifically designed for leading horses and should never be used while riding. These bits aid in training and control during ground work, ensuring safe handling and communication.

Bits Designed for Leading Horses

Certain bits are exclusively designed for leading horses in-hand, differing significantly from those used during riding. These in-hand bits prioritize control and communication from the ground, facilitating training and safe handling. They should never be used while riding.
These bits emphasize clear signals and responsiveness, helping the horse understand commands and maintain proper posture. Often, they incorporate features that encourage respect and attention from the horse, enhancing the handler’s ability to guide and direct.
Selecting the appropriate in-hand bit depends on the horse’s training level and temperament, ensuring a positive and productive ground work experience.

castle darkmoor guide

Embark on a thrilling adventure through Castle Darkmoor!
This comprehensive guide will navigate you through the treacherous dungeons.
Uncover secrets, defeat formidable bosses, and acquire powerful gear.
Prepare for a challenging journey in the heart of Darkmoor.
This guide provides efficient strategies for every encounter.

Castle Darkmoor stands as the initial and arguably most iconic dungeon within the larger Darkmoor instance. Wizards brave enough to enter will find themselves immersed in a gothic world filled with challenging battles and intricate puzzles.
This dungeon is a level 100 experience, designed to test the skills and strategies of seasoned players. Within its walls, wizards will encounter formidable bosses such as Yevgeny Nightcreeper and Sir Blackwater, each presenting unique combat mechanics.
As the first part of the Darkmoor trilogy, which includes the Upper Halls and the Graveyard, Castle Darkmoor sets the stage for the epic confrontation with Malistaire. It is here that players begin their quest, guided by Renfield Flygob, to unravel the mysteries and ultimately confront the dark forces at play.
Beyond the storyline, Castle Darkmoor is a popular destination for wizards seeking to farm for gear and assist friends. Be prepared to spend a considerable amount of time within its depths, mastering the strategies required to overcome its challenges.

Accessing Castle Darkmoor⁚ Quest Requirements

To embark on the perilous journey into Castle Darkmoor, Wizards must first meet specific quest prerequisites. The adventure begins with the quest “Dead Leaves,” initiated by Dworgyn at level 100. However, before “Dead Leaves” becomes available, players must complete the lead-in quest, “Branches of Woe,” also offered by Dworgyn.
These quests serve as the gateway to the Darkmoor storyline, unlocking access to all three dungeons⁚ Castle Darkmoor, the Upper Halls, and the Graveyard.
It is essential to ensure your wizard has reached level 100 to undertake these quests, as the challenges within Darkmoor are designed for experienced adventurers.
Players can choose to purchase access to Darkmoor permanently for 3495 Crowns, or opt for a 6-hour rental for 495 Crowns.
Completing these initial quests not only grants access to Castle Darkmoor but also sets the stage for the subsequent dungeons and the ultimate confrontation with Malistaire.

Renfield Flygob⁚ Your Guide in Darkmoor

Upon entering the ominous realm of Darkmoor, Wizards are greeted by Renfield Flygob, the Herald of Darkmoor. Renfield serves as a crucial guide, offering assistance and direction throughout the treacherous journey.
He is the initial point of contact, providing essential information and context for the challenges that lie ahead. Renfield’s presence marks the beginning of the Darkmoor saga, leading players into Castle Darkmoor, the Upper Halls, and the Graveyard.
As the Herald, Renfield is knowledgeable about the intricate pathways and dangers within Darkmoor, offering guidance to navigate the twisted corridors and face the formidable foes.
He provides invaluable insights into the lore and history of Darkmoor, enriching the overall experience.
Wizards should heed Renfield’s advice, as his guidance is instrumental in successfully traversing the perils of Darkmoor and ultimately confronting Malistaire.
His role as a guide is pivotal in ensuring players are well-prepared for the challenges ahead.

Initial Preparations⁚ Health and Mana Wisps

Before venturing deep into Castle Darkmoor, proper preparation is essential for survival.
Wizards should prioritize replenishing their health and mana, resources crucial for overcoming the challenges ahead.
Fortunately, the environment provides opportunities to restore these vital energies.
Red Health Wisps and blue Mana Wisps are strategically placed throughout Castle Darkmoor.
These wisps serve as invaluable checkpoints, allowing Wizards to recover after battles and prepare for subsequent encounters.
Notably, Health Wisps are located at the Castle Darkmoor entrance, providing immediate replenishment upon arrival.
Additionally, after the initial battle in the Lower Depths, more Health Wisps are available.

Furthermore, near the Upper Halls sigil, Wizards can find both Health and Mana Wisps, providing a crucial rest stop before proceeding.
These wisps are strategically placed, ensuring Wizards have access to resources at critical junctures.
Utilizing these wisps effectively can significantly enhance survivability, enabling Wizards to persevere through the trials of Castle Darkmoor.

Castle Darkmoor Map and Navigation

Navigating Castle Darkmoor can be a daunting task, given its labyrinthine layout and numerous hidden passages.
Understanding the castle’s map and mastering effective navigation techniques are crucial for success.
While a detailed in-game map may not be readily available, familiarizing yourself with key landmarks and directional cues is essential.
The castle is generally divided into distinct sections, including the Lower Depths, Upper Halls, and Graveyard.
Each area presents unique challenges and requires careful exploration.
Pay close attention to environmental details such as inclining ramps, switches, and other interactive elements.
These features often conceal secret passages or unlock new areas within the castle.
Utilize the mini-map to maintain situational awareness and track your progress.
Collaborate with your team to coordinate movements and ensure no area is overlooked.
Remember the location of key resources, such as Health and Mana Wisps, to facilitate efficient recovery.
By mastering the castle’s layout and employing effective navigation strategies, Wizards can minimize disorientation.

Boss Strategy⁚ Yevgeny Nightcreeper

Yevgeny Nightcreeper, the first boss encountered in Castle Darkmoor, presents a significant challenge that requires a well-coordinated strategy.
This fearsome werewolf possesses considerable strength and several unique abilities that can quickly overwhelm unprepared Wizards.
A key element to defeating Yevgeny is to have Conviction and Stun Blocks.
His attacks can inflict substantial damage, making it crucial to maintain a steady stream of healing.
However, beware of healing spells, as Yevgeny retaliates with gnomes.
This applies to pet heals as well, so be cautious when relying on pets for support.
Designate a spammer who will hit the boss every round, and ensure you use minor pip spells.
Focus on blading if you plan to use them.
Coordinate your attacks to maximize damage output while minimizing the risk of being stunned or incapacitated.
Consider utilizing stun blocks to mitigate the effects of Yevgeny’s stunning abilities.
Communicate effectively with your team to anticipate Yevgeny’s moves and adjust your strategy accordingly.
By understanding Yevgeny’s attack patterns and implementing a coordinated strategy, you can overcome this formidable foe.

Boss Strategy⁚ Sir Blackwater

Sir Blackwater, a formidable boss within Castle Darkmoor, requires a strategic approach to defeat.
This encounter demands coordination and understanding of his unique abilities.
Similar to the Von Shane battle, designating a spammer is crucial.
This designated player should consistently attack Sir Blackwater each round, utilizing minor pip spells.
The primary purpose of this strategy is to prevent him from unleashing devastating hits.
Maintaining a steady stream of damage disruption is key to controlling the battle’s momentum.
Focus on using efficient spells to maximize your damage output while conserving mana.
Coordinate your attacks with your team to capitalize on opportunities and minimize risks.
Communicate effectively to anticipate Sir Blackwater’s actions and adjust your strategy accordingly.
Remember to prioritize survivability, ensuring that everyone maintains adequate health.
By working together and employing a coordinated strategy, you can overcome Sir Blackwater.
This ensures you are able to progress further into Castle Darkmoor.
Mastering this encounter is crucial for successfully navigating the challenges that lie ahead.

The Castle Darkmoor Stone Key Room

The Castle Darkmoor Stone Key Room is a hidden chamber within the castle, holding valuable rewards.
It is located in the staircase leading to the Observatory after defeating Sir Blackwater.
Accessing this room requires a Stone Key, adding an extra layer of challenge.
Inside, you’ll find the Castle Darkmoor Locked Chest, containing coveted items.
Navigating to the Stone Key Room involves traversing treacherous paths and solving puzzles.
Be prepared for potential enemy encounters along the way, requiring strategic combat.
Coordinate with your team to ensure safe passage and efficient exploration.
The Stone Key Room offers a unique opportunity to acquire rare and powerful gear.
Consider the risks involved and weigh the potential rewards before embarking on this quest.
The chest may contain items essential for enhancing your character’s abilities.
Prepare your team by gathering adequate supplies and planning your approach carefully.
Communication and teamwork are crucial for successfully navigating the Stone Key Room.
Solving the puzzles and overcoming the challenges within will test your skills.
The Stone Key Room offers a rewarding experience for those who dare to venture inside.

Castle Darkmoor Locked Chest

The Castle Darkmoor Locked Chest is a treasure trove hidden within the Stone Key Room.
It is the final reward for those who successfully navigate the challenges of the castle.
This chest requires a specific key to unlock, adding an element of mystery and intrigue.
Inside, players can find valuable gear, including rare weapons, armor, and accessories.
The contents of the chest are highly sought after by wizards seeking to enhance their power.
Unlocking the chest requires careful planning and coordination with your team members.
The key may be obtained through various means, such as defeating specific enemies.
Consider the risks involved in obtaining the key and weigh the potential rewards.
The Locked Chest offers a unique opportunity to acquire powerful and exclusive items.
Prepare your team by gathering adequate supplies and strategizing your approach carefully.
Communication and teamwork are crucial for successfully unlocking the chest.
The items inside can significantly improve your character’s abilities and attributes.
The Locked Chest provides a rewarding experience for those who persevere.
Solving the puzzles and overcoming the challenges will test your skills.
The treasure is well worth the effort for those seeking to conquer Darkmoor.

Farming for Gear in Castle Darkmoor

Farming for gear in Castle Darkmoor is a common practice for wizards seeking powerful equipment.
The dungeon offers a variety of bosses and encounters that drop valuable items.
These items can significantly enhance your character’s abilities and overall strength.
Efficient farming strategies involve repeatedly defeating specific bosses known for their drops.
Targeting Yevgeny Nightcreeper, Sir Blackwater, or other key enemies can yield valuable rewards.
Focus on bosses that drop gear relevant to your wizard’s school and playstyle.
Consider the drop rates and adjust your farming strategy accordingly.
Teamwork is essential for successful farming, as it allows for faster completion times.
Establish a clear communication system to coordinate your attacks and strategies.
Optimize your wizard’s gear and skills to maximize your efficiency in combat.
Utilize buffing spells and enchantments to further enhance your damage output.
The Stone Key Room and Locked Chest also offer opportunities for valuable gear.
Consider participating in group farming sessions to increase your chances of success.
Patience and perseverance are key, as it may take multiple runs to acquire desired items.
Remember to manage your resources effectively, such as potions and reagents.

Navigating the Lower Depths and Upper Halls

Navigating the Lower Depths and Upper Halls of Castle Darkmoor presents unique challenges.
The Lower Depths are characterized by twisting corridors and interconnected chambers.
Exploration is crucial to uncover hidden passages and progress through the area.
Be prepared for encounters with various enemies lurking in the shadows.
Map awareness is essential to avoid getting lost in the labyrinthine layout.
The Upper Halls offer a different environment with stairwells and elevated chambers.
Verticality plays a significant role in navigating the Upper Halls.
Be cautious of enemies positioned on higher platforms.
Strategic positioning is essential for successful combat encounters.
The Upper Halls often feature puzzles or obstacles that require problem-solving skills.
Pay close attention to your surroundings for clues or hidden mechanisms.
Teamwork and communication are crucial for overcoming these challenges.
Coordinate your movements and strategies to ensure everyone’s safety.
Utilize teleportation spells or abilities to quickly traverse long distances.
Be mindful of traps and environmental hazards that can hinder your progress.
The Lower Depths and Upper Halls present a formidable test of skill and strategy.

Darkmoor Dungeon Order⁚ Castle, Upper Halls, Graveyard

The Darkmoor dungeon sequence consists of three distinct areas⁚ Castle Darkmoor, Upper Halls, and the Graveyard.
Each area presents increasing difficulty and unique challenges.
Castle Darkmoor serves as the initial entry point, introducing players to the storyline.
The Lower Depths and various chambers must be traversed to progress.
Yevgeny Nightcreeper and Sir Blackwater serve as the primary bosses.
The Upper Halls follow Castle Darkmoor, presenting a more complex layout.
Stairwells, passageways, and elevated chambers add to the difficulty.
Careful navigation and strategic combat are essential for success;
The Graveyard represents the final and most challenging dungeon in Darkmoor.
Powerful enemies and intricate puzzles await those who venture within.
Malistaire the Undying serves as the ultimate boss, requiring a coordinated effort.
Understanding the order of these dungeons is crucial for effective planning.
Preparing for each area with appropriate gear and strategies is essential.
Teamwork and communication are paramount for overcoming the challenges.
Following the designated order ensures a smooth progression through Darkmoor.
Skipping or altering the sequence can lead to significant difficulties.
Mastering each dungeon in the proper order is the key to victory.

Speed Run Tips and Efficient Strategies

For wizards seeking swift completion of Castle Darkmoor, efficient strategies are paramount.
Speed runs prioritize minimizing time spent in each encounter and maximizing damage output.
A well-coordinated team with optimized decks is essential for success.
Focus on eliminating key enemies quickly to avoid prolonged battles.
Strategic use of buffs and blades can significantly increase damage.
Avoid unnecessary battles and prioritize the main quest objectives.
Knowing the map layout and enemy spawn locations is crucial.
Utilize teleportation spells to bypass lengthy corridors and backtracking.
Communicate effectively with your team to coordinate attacks and strategies.
Designate specific roles for each member to maximize efficiency.
One wizard should focus on healing, while others prioritize damage.
Avoid overly cautious strategies that can prolong battles.
Embrace calculated risks to expedite the process.
Stun locking bosses can prevent them from using powerful attacks.
Utilize spells that provide multiple hits to break shields quickly.
Consider using treasure cards to supplement your deck with powerful spells.
Practice the dungeon multiple times to familiarize yourself with the layout.
The most important aspect of a speed run is the team’s synergy.

razorback warframe guide

The Razorback Armada is a regular, player-triggered event in Warframe. This guide covers how the Razorback Armada event works. You’ll need to craft Razorback Ciphers to start the event, and understand the boss fight mechanics.

What is the Razorback Armada Event?

The Razorback Armada is a recurring event in Warframe, presenting a unique challenge against a Corpus boss known as the Razorback. Unlike standard boss encounters, defeating the Razorback requires more than just brute force. Strategy and utilization of Warframe’s hacking system are essential for success. The event is a limited-time affair, threatening to destroy Relays and requiring Tenno to band together to fend off the Corpus threat. The Razorback itself is a creation of Nef Anyo, essentially a larger, more formidable version of the Jackal. It’s boastfully claimed to be impervious to evil, but possesses a vulnerability that Tenno must exploit. The event acts as a player-triggered one, which adds a new boss to the game. The Razorback Armada involves fighting the Razorback multiple times over the course of the event. To participate, players need to craft a special item called the Razorback Cipher, requiring resources gathered from specific locations. The event takes place on a node near a besieged Relay, unlocked specifically during the Armada’s active period.

During the Razorback fight, Lotus provides transmissions guiding players on how to defeat Nef Anyo’s prototype. She emphasizes the importance of turning his scheme against him to prevent him from gaining new offerings; The Razorback itself transmits boastful messages about its “Victory Probability⁚ UNFATHOMABLE” and detecting threats, warning of the Void’s potential mercy. Players have noted issues with hacking Bursas during the fight, sometimes encountering line-of-sight problems with pillars near the Bursa spawn points. The Razorback fight takes place in the Jackal arena and begins with the mech enjoying complete immunity to all damage. To generate the chance to hurt it, you need to jump up to the balconies on either side of the arena and hack the consoles there. This will spawn a Bursa that you can damage and then hack, and this will then attack the Razorback, bypassing the damage immunity and damaging the legs. Bursas will spawn behind the lazer cage use the corresponding console to release the bursa once its dropped down into the arena, kill and hack it. once it has been hacked, it will stun the razorback, dropping its shields. UNLOAD ONTO IT rinse and repeat till dead.

Crafting Razorback Ciphers

To participate in the Razorback Armada event and access the Razorback assassination node, players are required to craft Razorback Ciphers. The Razorback Cipher is a special gear item essential for initiating the boss fight. Each player in the squad must equip at least one Cipher to gain access to the Razorback assassination mission, which becomes available near the besieged Relay during the event. Crafting these Ciphers involves gathering specific resources, most notably Cryptographic ALU, which can be a challenging endeavor due to its low drop rate. The difficulty in acquiring Cryptographic ALU has led some players to suggest using Resource Boosters to improve farming efficiency, although this requires spending Platinum. The resource requirements for crafting a Razorback Cipher are Cryptographic ALU. Due to the low drop rate of Cryptographic ALU, farming it without Resource Boosters can be quite tedious. Players may consider purchasing Resource Boosters for 80 Platinum to enhance their farming efforts and efficiently acquire the necessary resources for crafting multiple Ciphers.

The Razorback Cipher allows access to the Razorback assassination node near the besieged relay, unlocked during the event. Transmissions during the Razorback boss fight. Lotus⁚ If Nef Anyos prototype survives our assault, hell be able to draw in a mountain of new offerings. We must turn his scheme against him. Razorback⁚ Victory Probability⁚ UNFATHOMABLE Razorback⁚ Detected⁚ May the Void take mercy upon. The Resource Required to Craft The Razorback Cipher (Cryptographic Alu) has a Terrible Drop Rate. In fact its So Bad that attempting to Farm it without Boosters is just Stupid. So if you want to Effectively Do this Event you need 80 Platinum (for both Resource Boosters). The Razorback Armada is a quick little event with a singular purpose. You need to blow up a Razorback. Well, technically you want to destroy at least three to. In this guide, we cover how the Razorback Armada event works, how to craft Razorback Ciphers to start the event, where you can find Cryptoglyphic Alu. The Razorback Armada is a regular event in Warframe and features a variant Jackal boss that you need to fight multiple times over the course of the event. You will need to create a special cipher.

Cryptographic ALU Farming

Cryptographic ALU is a crucial resource required to craft Razorback Ciphers, which are necessary for accessing the Razorback assassination node during the Razorback Armada event. Farming Cryptographic ALU can be a challenging task due to its notoriously low drop rate. Many players consider the drop rate so poor that attempting to farm it without the aid of Resource Boosters is highly inefficient and time-consuming. To effectively farm Cryptographic ALU, players often resort to purchasing Resource Boosters, which cost Platinum. Investing in both Resource Boosters can significantly increase the amount of Cryptographic ALU obtained per mission, making the farming process more manageable and less frustrating. The Razorback mission takes place on Saturn, meaning Orokin Cells are the rare region resource. As you probably know, outside of the Razorback mission, Orokin Cells are also notoriously difficult to farm. The Razorback Armada is a quick little event with a singular purpose. You need to blow up a Razorback. Well, technically you want to destroy at least three to. In this guide, we cover how the Razorback Armada event works, how to craft Razorback Ciphers to start the event, where you can find Cryptoglyphic Alu.

Cryptographic Alu / Kill The Razorback Brigade, in this video we talk about Cryptographic Alu, where to get Cryptographic Alu, Cryptographic. The Razorback Armada is a regular event in Warframe and features a variant Jackal boss that you need to fight multiple times over the course of the event. You will need to create a special cipher. The Resource Required to Craft The Razorback Cipher (Cryptographic Alu) has a Terrible Drop Rate. In fact its So Bad that attempting to Farm it without Boosters is just Stupid. So if you want to Effectively Do this Event you need 80 Platinum (for both Resource Boosters). The Razorback Cipher allows access to the Razorback assassination node near the besieged relay, unlocked during the event. The Razorback is a Corpus boss introduced in the Divine Will Tactical Alert in Hotfix 18.4.10 (2016-02-11). A creation of Nef Anyo. The Resource Required to Craft The Razorback Cipher (Cryptographic Alu) has a Terrible Drop Rate. Infact its So Bad that attempting to Farm it without Boosters is just Stupid. So if you want to Effectively Do this Event you need 80 Platinum (for both Resource Boosters).Oh but Wait.

Accessing the Razorback Assassination Node

To participate in the Razorback Armada event and confront the Razorback boss, you must first gain access to the Razorback assassination node. This node is a special mission that becomes available on the Star Chart specifically during the event. The key requirement for unlocking access to this node is the Razorback Cipher. Each player within the squad is required to have at least one Razorback Cipher equipped in their gear wheel; Without a Razorback Cipher equipped, a player will not be able to join the Razorback assassination mission. The Razorback Cipher is a special gear item for use during the Razorback Armada invasion events. Each player of the squad is required to equip at least one of them to allow access to the Razorback assassination node near the besieged relay, unlocked during the event. The Razorback Armada is a quick little event with a singular purpose. You need to blow up a Razorback. Well, technically you want to destroy at least three to. In this guide, we cover how the Razorback Armada event works, how to craft Razorback Ciphers to start the event, where you can find Cryptoglyphic Alu.

The Razorback Armada is a regular event in Warframe and features a variant Jackal boss that you need to fight multiple times over the course of the event. You will need to create a special cipher. The Resource Required to Craft The Razorback Cipher (Cryptographic Alu) has a Terrible Drop Rate. In fact its So Bad that attempting to Farm it without Boosters is just Stupid. So if you want to Effectively Do this Event you need 80 Platinum (for both Resource Boosters). The Razorback Cipher allows access to the Razorback assassination node near the besieged relay, unlocked during the event. The Razorback is a Corpus boss introduced in the Divine Will Tactical Alert in Hotfix 18.4.10 (2016-02-11). A creation of Nef Anyo. The Resource Required to Craft The Razorback Cipher (Cryptographic Alu) has a Terrible Drop Rate. Infact its So Bad that attempting to Farm it without Boosters is just Stupid. So if you want to Effectively Do this Event you need 80 Platinum (for both Resource Boosters).Oh but Wait.

The Razorback Armada is one of Warframes world events that can pop up anytime. The Razorback is a Corpus boss introduced in the Divine Will Tactical Alert in Hotfix 18.4.10 (2016-02-11). A creation of Nef Anyo. The Resource Required to Craft The Razorback Cipher (Cryptographic Alu) has a Terrible Drop Rate. Infact its So Bad that attempting to Farm it without Boosters is just Stupid. So if you want to Effectively Do this Event you need 80 Platinum (for both Resource Boosters).

The Razorback Boss Fight Mechanics

The Razorback boss fight in Warframe presents a unique challenge compared to other boss encounters. Unlike most bosses, the Razorback is initially immune to direct weapon damage. To effectively damage the Razorback, players must utilize a specific sequence of actions involving hacking Bursas. The fight takes place in the Jackal arena and begins with the mech enjoying complete immunity to all damage. Unlike most bosses in Warframe, the Razorback will take more than just the games strongest weapons to take it down. In fact, your basic weapons arent even going to be able to hurt the Razorback. Instead, youll need to employ strategy and make use of the games hacking system in order. To generate the chance to hurt it, you need to jump up to the balconies on either side of the arena and hack the consoles there. This will spawn a Bursa that you can damage and then hack, and this will then attack the Razorback, bypassing the damage immunity and damaging the legs. Bursas will spawn behind the lazer cage use the corresponding console to release the bursa once its dropped down into the arena, kill and hack it. once it has been hacked, it will stun the razorback, dropping its shields. UNLOAD ONTO IT rinse and repeat till dead.

To initiate the damage phase, players must first hack consoles located on the upper platforms of the arena. Hacking these consoles releases a Bursa enemy into the arena. Players must then defeat the Bursa and subsequently hack it. A hacked Bursa will then target and attack the Razorback, temporarily disrupting its shields and armor, making it vulnerable to damage. Players must then focus their fire on the Razorback during this vulnerability window. The Razorback fight takes place in the Jackal arena and begins with the mech enjoying complete immunity to all damage. To generate the chance to hurt it, you need to jump up to the balconies on either side of the arena and hack the consoles there. This will spawn a Bursa that you can damage and then hack, and this will then attack the Razorback, bypassing the damage immunity and damaging the legs. Bursas will spawn behind the lazer cage use the corresponding console to release the bursa once its dropped down into the arena, kill and hack it. once it has been hacked, it will stun the razorback, dropping its shields. UNLOAD ONTO IT rinse and repeat till dead.

The process of hacking consoles, defeating and hacking Bursas, and damaging the Razorback must be repeated multiple times to defeat the boss. The Razorback is a Corpus boss introduced in the Divine Will Tactical Alert in Hotfix 18.4.10 (2016-02-11). A creation of Nef Anyo.

Hacking Bursas to Damage the Razorback

A crucial element of the Razorback boss fight in Warframe is the strategic hacking of Bursas to create opportunities for damaging the boss. The Razorback itself is initially invulnerable to standard weapon attacks, so players must rely on hacked Bursas to bypass its defenses. Here’s a breakdown of the Bursa hacking process and its significance in the fight⁚

Bursa Spawning⁚ To initiate the process, players must first interact with consoles located on the upper platforms of the arena. Activating these consoles triggers the deployment of a Bursa enemy into the combat area. These Bursas emerge from behind a laser cage, requiring players to strategically release them into the arena. Bursas will spawn behind the lazer cage use the corresponding console to release the bursa once its dropped down into the arena, kill and hack it; Once a Bursa has been released, players must engage and defeat it.

Bursa Hacking⁚ After defeating a Bursa, players must then hack it using their Warframe’s hacking ability. This requires approaching the downed Bursa and initiating the hacking sequence. Successfully hacking the Bursa is essential, as it reprograms the unit to target the Razorback instead of the players.

Razorback Vulnerability⁚ Once a Bursa has been successfully hacked, it will turn its attention to the Razorback and unleash an attack. This attack temporarily disrupts the Razorback’s shields and armor, creating a window of vulnerability. During this vulnerability window, players must focus their fire on the Razorback to inflict damage. This is the only time during the fight when the Razorback is susceptible to weapon damage. To generate the chance to hurt it, you need to jump up to the balconies on either side of the arena and hack the consoles there. This will spawn a Bursa that you can damage and then hack, and this will then attack the Razorback, bypassing the damage immunity and damaging the legs. Bursas will spawn behind the lazer cage use the corresponding console to release the bursa once its dropped down into the arena, kill and hack it. once it has been hacked, it will stun the razorback, dropping its shields. UNLOAD ONTO IT rinse and repeat till dead.

Repeat the Process⁚ The vulnerability window created by a hacked Bursa is only temporary. After a short period, the Razorback will regain its defenses, requiring players to repeat the process of spawning, defeating, and hacking Bursas to create new opportunities for damage. This cycle continues until the Razorback is defeated.

Razorback’s Attacks and Avoiding Damage

The Razorback is a formidable Corpus boss in Warframe, possessing a range of attacks that can quickly overwhelm unprepared players. Successfully navigating the Razorback fight requires understanding its attack patterns and employing effective strategies to avoid damage. Here’s a breakdown of Razorback’s attacks and tips for staying alive⁚

Ferrite Spikes⁚ The Razorback can fire Ferrite Spikes at high speeds. They’re quick, slightly larger than a Charger, and capable of wall running and climbing. These projectiles can inflict significant damage, especially at longer ranges. To avoid these spikes, utilize cover, such as pillars or walls, to shield yourself. Employing evasive maneuvers like dodging, sliding, or bullet jumping can also help you evade the spikes. Prioritize maintaining awareness of the Razorback’s position and movements to anticipate and react to these attacks effectively.

Melee Attacks⁚ While the Razorback can attack at range, it is also focused on its melee. If players get too close, the Razorback will resort to powerful melee attacks. These attacks can easily down Warframes with low health or armor. To mitigate the risk of melee damage, maintain a safe distance from the Razorback whenever possible. Utilize Warframe abilities that grant invulnerability or crowd control to create openings for attack while minimizing the risk of retaliation.

Missiles⁚ The Razorback is also capable of launching barrages of missiles that can blanket the arena with explosions. These missiles can inflict area-of-effect damage, making them particularly dangerous in confined spaces. To avoid missile damage, prioritize staying mobile and using the environment to your advantage. Seek cover behind pillars or other obstacles to shield yourself from the explosions. Warframes with high mobility or abilities that grant damage reduction can also mitigate the impact of these attacks. When it launches missiles, stand behind a pillar.

General Tips for Avoiding Damage⁚

  • Stay Mobile⁚ Remaining stationary makes you an easy target for the Razorback’s attacks. Keep moving and use evasive maneuvers to avoid incoming projectiles and melee strikes.
  • Use Cover⁚ The arena is filled with pillars and other structures that can provide cover from the Razorback’s attacks. Utilize these to your advantage, especially when reloading or recovering health.
  • Warframe Abilities⁚ Many Warframes possess abilities that can enhance survivability, such as invulnerability, crowd control, or damage reduction. Utilize these abilities strategically to mitigate the Razorback’s attacks.