North Carolina’s erosion control manual guides planning and design, addressing sedimentation laws and principles․ It details vegetative practices and site-specific plan development․
Purpose of the Manual
This manual serves as a comprehensive resource for professionals involved in land-disturbing activities across North Carolina․ It aims to provide clear guidance on complying with state sedimentation control laws, specifically 15A NCAC 04B․ The document details processes and principles of erosion, emphasizing the importance of effective sediment control practices․
Furthermore, it assists in preparing thorough erosion and sedimentation control plans, outlining site assessment techniques and plan review procedures․ By offering detailed practice standards and specifications, the manual promotes responsible land development that minimizes environmental impact and protects valuable natural resources within the state․
Regulatory Framework in North Carolina
North Carolina’s regulatory framework for erosion and sediment control is primarily governed by 15A NCAC 04B, establishing legal authority and detailed regulations․ This Subchapter dictates requirements for land-disturbing activities, ensuring responsible land use practices․ Various state agencies share roles and responsibilities in enforcing these regulations, promoting consistent oversight․
Land developers must adhere to permitting requirements before commencing any activity, demonstrating compliance with established standards․ The framework emphasizes protection from runoff generated by a 10-year storm event, necessitating careful planning and implementation of appropriate control measures․
Importance of Erosion and Sediment Control
Effective erosion and sediment control is crucial for protecting North Carolina’s valuable natural resources․ Uncontrolled erosion leads to sedimentation in waterways, degrading water quality and harming aquatic habitats․ Proper control measures safeguard infrastructure, preventing costly damage to roads, bridges, and utilities․
Furthermore, these practices minimize soil loss, preserving land productivity and agricultural viability․ Implementing Best Management Practices (BMPs) during construction, as outlined in Section 050․02, is essential․ Regular inspection and maintenance ensure long-term effectiveness, protecting both the environment and public safety․
North Carolina Sedimentation Control Law
North Carolina’s law, 15A NCAC 04B, governs land disturbance, establishing agency roles and permitting for activities impacting sedimentation and erosion control․
Legal Authority and Regulations (15A NCAC 04B)
The North Carolina Sedimentation Control Law, codified in 15A NCAC 04B, provides the legal foundation for erosion and sediment control across the state․ This comprehensive regulation establishes standards for land-disturbing activities, aiming to minimize environmental impacts․ It details requirements for design, construction, and maintenance of control measures, ensuring protection from runoff—specifically, the runoff generated by a 10-year storm event producing maximum peak flow․
Subchapter 4B outlines specific rules concerning erosion and sediment control practices, encompassing structures and devices․ Compliance with 15A NCAC 04B is crucial for developers, contractors, and local governments to safeguard water quality and prevent land degradation․
Roles and Responsibilities of Agencies
Various North Carolina agencies share responsibility for implementing and enforcing the Sedimentation Control Law․ The North Carolina Department of Environmental Quality (NCDEQ) provides overall guidance and oversight, establishing state-level standards and offering technical assistance․ Local governments, including counties and municipalities, typically administer the program at the local level, reviewing plans, issuing permits, and conducting inspections․
These local agencies ensure compliance with state regulations within their jurisdictions․ Collaboration between state and local entities is vital for effective erosion and sediment control, protecting valuable natural resources throughout North Carolina․
Permitting Requirements for Land Disturbing Activities
North Carolina law requires permits for land-disturbing activities exceeding specified thresholds․ Generally, any project disturbing one acre or more necessitates a National Pollutant Discharge Elimination System (NPDES) permit, administered by the NCDEQ․ Smaller projects, though potentially exempt from state-level permitting, may still require local approvals․
The permitting process involves submitting a detailed Erosion and Sedimentation Control Plan demonstrating how erosion will be minimized and sediment controlled․ Compliance with plan specifications and permit conditions is crucial throughout the project’s lifecycle․

Processes and Principles of Erosion and Sedimentation
Erosion involves soil detachment and transport, influenced by rainfall, slope, and soil type․ Sedimentation is the deposition of eroded materials, impacting water quality․
Understanding Erosion Processes
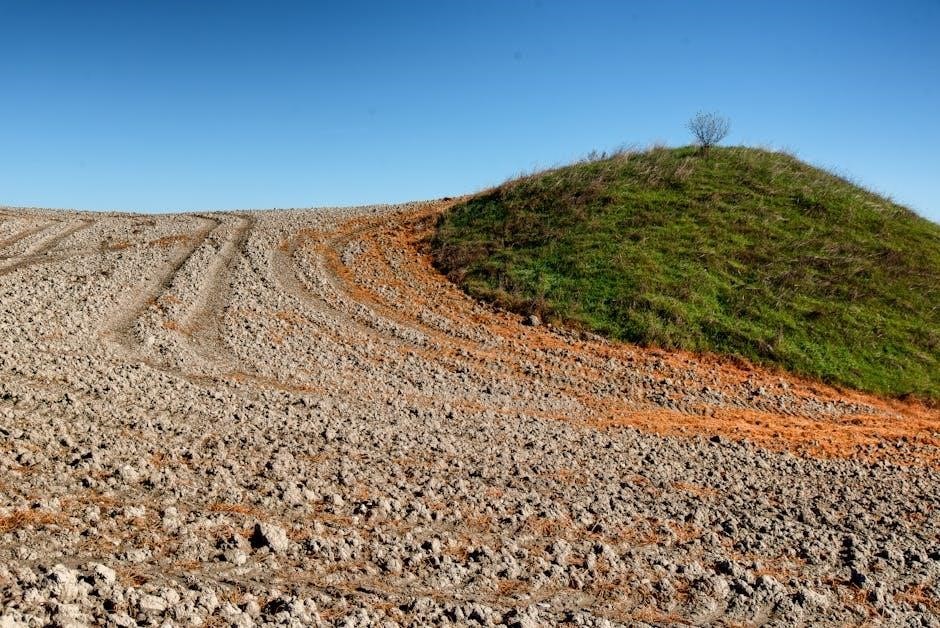
Erosion is a natural process, but human activities can significantly accelerate it․ Detachment involves dislodging soil particles, primarily by rainfall impact and flowing water․ Transport then carries these particles downslope․ Several types of erosion exist, including sheet erosion (uniform removal), rill erosion (small channels), and gully erosion (larger channels)․
The erosive force of rainfall depends on intensity and duration․ Slope steepness and length also play crucial roles; steeper, longer slopes experience greater erosion․ Soil characteristics, like texture and organic matter content, influence erodibility․ Understanding these processes is fundamental for effective erosion and sediment control planning, ensuring environmental protection and regulatory compliance within North Carolina․
Factors Influencing Erosion Rates
Numerous factors dictate the speed at which erosion occurs․ Rainfall intensity, duration, and frequency are primary drivers, with heavier storms causing more significant soil loss․ Topography, specifically slope steepness and length, dramatically impacts runoff velocity and erosive power․ Soil type is critical; easily erodible soils like silt loam are more vulnerable․
Vegetative cover provides vital protection, while its absence increases erosion․ Land use practices, such as construction or agriculture, disturb the soil and elevate rates․ Climate, including temperature and wind, also contributes․ Recognizing these interconnected factors is essential for developing targeted erosion control strategies in North Carolina․
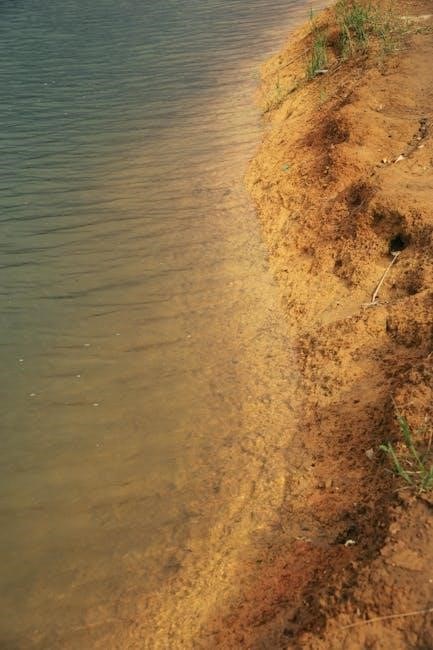
Sediment Transport and Deposition
Sediment transport describes how eroded soil particles are moved by water and wind․ The capacity of runoff to carry sediment depends on velocity and flow volume; faster flows transport larger particles․ Transport mechanisms include suspension, where fine particles remain airborne, and traction, involving rolling or sliding of larger grains․
Deposition occurs when transport energy decreases, causing sediment to settle․ This often happens as runoff slows down in flatter areas or enters larger bodies of water․ Understanding transport and deposition patterns is crucial for predicting sediment delivery to streams and designing effective control measures to minimize downstream impacts in North Carolina․
Preparing the Erosion and Sedimentation Control Plan
Developing a site-specific plan involves thorough assessment and analysis, followed by review and approval processes, ensuring compliance with North Carolina’s regulations․
Site Assessment and Analysis
A comprehensive site assessment is the foundational step in crafting an effective erosion and sedimentation control plan․ This crucial phase demands a detailed evaluation of existing site conditions, encompassing topography, soil types, and drainage patterns․ Analyzing these elements allows for accurate prediction of potential erosion risks and sediment transport pathways․
Furthermore, the assessment must identify all land-disturbing activities planned for the site, quantifying the extent and duration of these disturbances․ Consideration should be given to sensitive areas like wetlands, streams, and steep slopes, requiring heightened protection measures․ Accurate mapping and documentation of these features are essential for informed decision-making throughout the planning process, ensuring minimal environmental impact․
Developing a Site-Specific Plan
Crafting a site-specific erosion and sedimentation control plan necessitates a tailored approach, directly responding to the unique characteristics revealed during the site assessment․ This plan must meticulously detail the sequence of construction activities, outlining specific Best Management Practices (BMPs) to be implemented at each stage․
The plan should clearly illustrate the placement and specifications of all control measures, including perimeter sediment controls, inlet protection, and diversion structures․ It’s vital to incorporate a robust stormwater management strategy, designed to handle runoff from both existing and disturbed areas․ Regular inspections and maintenance schedules must also be defined, ensuring the plan’s long-term effectiveness․
Plan Review and Approval Process
Submitting an erosion and sedimentation control plan initiates a thorough review by the relevant local government agency, ensuring compliance with North Carolina’s regulations (15A NCAC 04B)․ This review assesses the plan’s adequacy in preventing sediment from leaving the site and protecting downstream water quality․
Expect potential requests for revisions or clarifications to address deficiencies․ Once approved, the plan becomes a legally binding document, and adherence is crucial throughout the construction process․ Proper documentation of all plan modifications and approvals is essential for maintaining compliance and avoiding potential penalties․

Vegetative Considerations
Vegetation plays a vital role in erosion control, stabilizing soil and reducing runoff․ Selecting appropriate species and maintaining them are key components․
Importance of Vegetation in Erosion Control
Vegetation is fundamentally crucial for effective erosion and sediment control in North Carolina․ Plant cover shields the soil surface from the direct impact of rainfall, significantly reducing its erosive force․ Root systems bind soil particles together, increasing soil stability and resistance to detachment․
Furthermore, vegetation slows down the velocity of runoff, allowing more water to infiltrate into the ground, lessening the volume and peak flow of stormwater․ This natural process minimizes sediment transport and protects water quality in receiving streams and rivers․ Properly established and maintained vegetation is a cost-effective and environmentally sound best management practice․
Selecting Appropriate Vegetation Species
Choosing the right vegetation species is vital for successful erosion control in North Carolina․ Factors like soil type, climate, slope, and anticipated maintenance levels must be considered․ Native plants are generally preferred due to their adaptability and benefit to local ecosystems․
Grasses, legumes, and trees offer varying degrees of erosion protection․ Quick-establishing annuals provide temporary cover, while perennials offer long-term stability․ Species selection should also account for potential invasive characteristics․ Consulting local resources and the NCDEQ guidelines ensures appropriate choices for site-specific conditions, maximizing effectiveness․
Establishing and Maintaining Vegetation
Successful vegetation establishment requires proper seedbed preparation, including soil testing and amendment․ Seeding rates should adhere to recommendations based on species and site conditions․ Immediate and consistent moisture is crucial for germination and initial growth, potentially requiring irrigation․
Ongoing maintenance, such as weed control and fertilization, is essential for long-term effectiveness․ Periodic inspections help identify and address areas needing re-seeding or repair․ Protecting young vegetation from grazing or damage ensures successful establishment and sustained erosion control benefits, aligning with NCDEQ standards․
Overview of Erosion and Sedimentation Control Practices
The manual details temporary and permanent stabilization, alongside structural practices․ These methods minimize soil disturbance and control runoff, protecting North Carolina’s valuable resources․
Temporary Stabilization Measures
Temporary stabilization is crucial during construction, preventing immediate erosion․ Techniques include applying mulch – straw, wood chips, or synthetic varieties – to cover exposed soils․ Soil stabilization fabrics offer another layer of protection, binding soil particles together․ Hydroseeding, a slurry of seed, mulch, fertilizer, and tackifier, establishes quick vegetative cover․
These practices are vital when permanent stabilization is delayed․ They minimize sediment leaving the site, safeguarding water quality․ Proper installation and maintenance are essential for effectiveness, especially during rainfall events․ The NC manual provides detailed specifications for each method, ensuring compliance with regulations and optimal performance․
Permanent Stabilization Measures
Permanent stabilization establishes long-term erosion control after construction concludes․ This primarily involves establishing a dense vegetative cover through seeding or planting․ Selecting appropriate species for the local climate and soil conditions is critical for success․ Turfgrass, trees, and shrubs all contribute to soil stabilization, reducing erosion potential․
Alternatively, engineered solutions like retaining walls or riprap can provide permanent protection in areas unsuitable for vegetation․ The NC Erosion Control Manual emphasizes selecting measures that integrate with the surrounding landscape and minimize environmental impact․ Proper implementation and ongoing maintenance are key to ensuring long-term effectiveness․
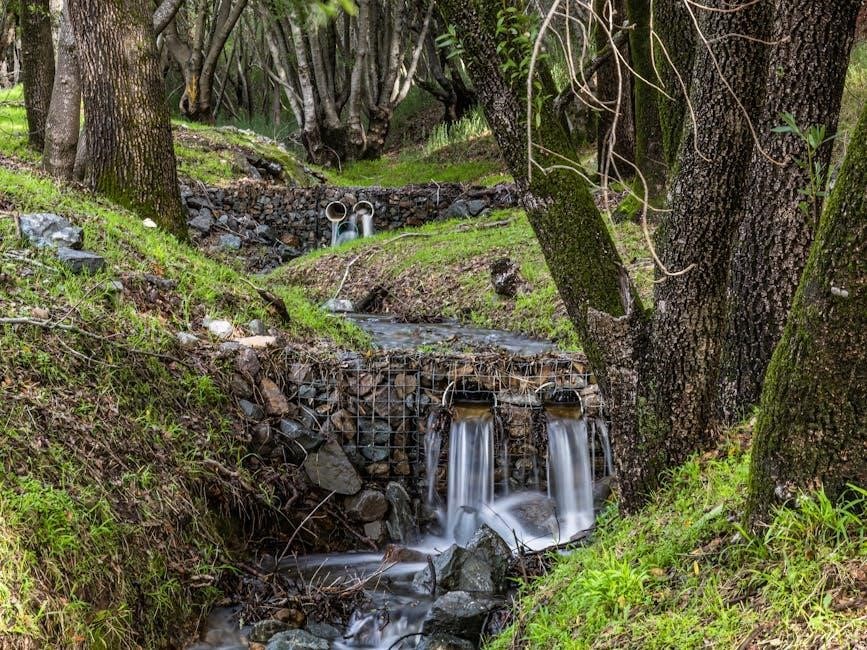
Structural Practices for Erosion Control
Structural practices offer robust erosion control, especially where vegetation alone is insufficient․ These include retaining walls, channel linings (riprap, concrete), and diversions to manage concentrated flow․ Properly designed and installed structures intercept runoff, reduce its velocity, and prevent soil detachment․
The NC Erosion Control Manual details specifications for each practice, emphasizing proper foundation preparation and material selection․ Regular inspection and maintenance are crucial to ensure continued functionality․ These structural solutions complement vegetative measures, providing a comprehensive approach to erosion and sediment control on construction sites and beyond․

Practice Standards and Specifications: Site Control Measures
NC’s manual specifies standards for silt fences, straw wattles, inlet protection, and diversions․ These site controls minimize sediment leaving the disturbed area effectively․
Perimeter Sediment Control (Silt Fences, Straw Wattles)
Perimeter controls, like silt fences and straw wattles, are crucial first-line defenses against sediment leaving construction sites․ The NC Erosion and Sediment Control Manual details proper installation and maintenance․ Silt fences, made of geotextile fabric, trap sediment runoff, while straw wattles, composed of compacted straw, slow water flow and filter sediment․
Effective placement is key; these barriers must follow the contour of the land and be regularly inspected․ Proper anchoring and fabric integrity are vital for optimal performance․ These practices prevent pollution of nearby waterways and maintain water quality standards, aligning with NC’s regulatory framework․
Inlet Protection (Drop Inlets, Curb Inlets)
Inlet protection measures, detailed within the NC Erosion and Sediment Control Manual, safeguard storm drainage systems from sediment intrusion․ Drop inlet protection utilizes devices like filter bags or gravel to trap sediment before it enters the system․ Curb inlet protection employs sediment traps or barriers along the curb to divert sediment-laden runoff․
Regular inspection and maintenance are essential; accumulated sediment must be removed promptly to maintain functionality․ Proper installation, conforming to NC standards, ensures effective capture of pollutants and prevents clogging of downstream infrastructure, protecting water quality and complying with regulations․
Diversion and Channel Stabilization
Diversion practices, as outlined in the NC Erosion and Sediment Control Manual, redirect stormwater runoff away from disturbed areas, minimizing erosion potential․ These include diversion channels and berms, carefully graded to convey water safely․ Channel stabilization techniques protect existing waterways from erosion damage․
Methods encompass vegetation, riprap, and check dams, reducing flow velocity and securing channel banks․ Proper design, adhering to NC standards, is crucial for effective performance․ Regular inspection and maintenance, including vegetation upkeep and sediment removal, ensure long-term stability and water quality protection․
Specific Erosion Control Techniques
NC manuals detail techniques like soil stabilization fabrics, hydroseeding, and terracing․ These methods minimize soil disturbance and runoff, promoting effective erosion prevention․
Soil Stabilization Fabrics
Soil stabilization fabrics, crucial in North Carolina’s erosion control, offer immediate protection for exposed soils․ These geosynthetics, available in woven and non-woven forms, are deployed to bind soil particles together, resisting raindrop impact and reducing surface erosion․ They’re particularly effective on slopes and channels, providing temporary stabilization until permanent vegetation establishes․
Proper installation is paramount; fabrics must be securely anchored and overlapped according to manufacturer specifications and the NC Erosion and Sediment Control Planning and Design Manual․ Selection depends on slope steepness, soil type, and anticipated runoff velocity․ Regular inspection and maintenance are vital to ensure continued effectiveness, addressing any tears or displacement promptly․
Hydroseeding and Mulching
Hydroseeding and mulching represent cost-effective temporary stabilization methods detailed within the NC Erosion and Sediment Control Planning and Design Manual․ Hydroseeding involves spraying a slurry of seed, fertilizer, mulch, and tackifier onto prepared soil surfaces, fostering rapid vegetation growth․ Mulching, often applied with hydroseeding, provides immediate protection against erosion by shielding the soil from rainfall impact and wind․
Choosing the correct seed mix and mulch type is crucial, considering site conditions and desired vegetation․ Proper application rates and consistent moisture are essential for successful establishment․ Regular inspections ensure adequate coverage and address any areas requiring re-application․
Terracing and Grading
Terracing and grading, as outlined in the NC Erosion and Sediment Control Planning and Design Manual, are fundamental earthwork practices for minimizing erosion․ Terracing involves creating a series of level platforms on sloping land, reducing runoff velocity and length of slope․ Careful grading reshapes the land surface to divert water to stable outlets or storage areas․
Proper design considers soil type, slope steepness, and anticipated rainfall intensity․ Compaction of fill materials is vital to prevent settlement and erosion․ Maintaining stable cut and fill slopes through appropriate benching and vegetation is crucial for long-term effectiveness․
Stormwater Management and Runoff Control
NC’s manual emphasizes 10-year storm event design criteria for runoff control, utilizing detention/retention basins, vegetated swales, and filter strips effectively․
10-Year Storm Event Design Criteria
North Carolina’s erosion and sedimentation control regulations, specifically 15A NCAC 04B, mandate that all erosion control measures, structures, and devices are meticulously planned, designed, and constructed․ This crucial requirement ensures robust protection against runoff originating from a 10-year storm event․
The 10-year storm is defined as the rainfall event statistically expected to occur once every ten years, producing the maximum peak discharge․ This design standard guarantees adequate capacity and functionality of implemented control practices․ Adhering to this criterion minimizes downstream impacts, protecting water quality and preventing property damage․ Proper implementation is vital for regulatory compliance and environmental stewardship․
Detention and Retention Basins
Detention and retention basins are critical stormwater management practices outlined in the NC erosion control manual․ Detention basins temporarily store runoff, releasing it at a controlled rate to reduce peak flows and prevent downstream erosion․ Retention basins, conversely, permanently hold water, allowing for evaporation and infiltration, further reducing runoff volume․
These basins are designed to manage the quantity and quality of stormwater, complying with the 10-year storm event criteria․ Proper design considers factors like basin volume, outlet structure, and emergency spillway․ Regular maintenance, including sediment removal, is essential for continued effectiveness and regulatory compliance, safeguarding North Carolina’s waterways․
Vegetated Swales and Filter Strips
Vegetated swales and filter strips are essential components of stormwater management, detailed within the NC erosion control manual․ Swales are designed as broad, shallow channels that convey runoff while promoting infiltration and filtering pollutants․ Filter strips are gently sloping vegetated areas that slow runoff velocity and trap sediment before it reaches waterways․
These practices effectively reduce both the volume and velocity of stormwater, minimizing erosion potential․ Proper vegetation selection and maintenance are crucial for optimal performance․ They contribute to meeting the 10-year storm event design criteria, offering a sustainable and cost-effective approach to runoff control in North Carolina․

Construction Site Runoff Controls
BMPs for construction sites, outlined in Section 050․02 of the NC manual, prioritize soil erosion and sedimentation control through inspection and maintenance․
Best Management Practices (BMPs) for Construction Sites
Implementing Best Management Practices (BMPs) is crucial for minimizing environmental impact during construction․ These practices, detailed within the North Carolina Erosion and Sediment Control Manual, focus on preventing soil disturbance and controlling runoff․ Key BMPs include utilizing silt fences and straw wattles for perimeter control, employing inlet protection for catch basins, and establishing temporary and permanent stabilization measures․
Proper site grading, diversion channels, and sediment traps are also essential components․ Regular site inspections and diligent maintenance of these BMPs are paramount to ensure their effectiveness․ Adherence to Section 050․02, concerning soil erosion and sedimentation control, is mandatory for all construction activities in North Carolina, safeguarding water quality and minimizing downstream sedimentation․
Section 050․02: Soil Erosion and Sedimentation Control
Section 050․02 of the Fuquay-Varina, NC standards comprehensively addresses soil erosion and sedimentation control on construction sites․ It mandates strict adherence to the North Carolina Erosion and Sediment Control Manual, alongside current Town Standard Specifications and Construction Details․ This section outlines required practices for minimizing disturbance, controlling runoff, and preventing sediment from leaving the site․
Detailed specifications cover everything from perimeter controls like silt fences to inlet protection and proper site stabilization techniques․ Compliance ensures projects meet environmental regulations, protecting local waterways․ Thorough documentation and consistent implementation of these controls are essential for successful project completion and environmental stewardship․
Inspection and Maintenance Procedures
Regular inspections are crucial for effective erosion and sediment control, ensuring Best Management Practices (BMPs) function as intended․ These inspections, detailed within the NC manual, must document site conditions, identify any deficiencies, and promptly report them․ Maintenance is equally vital; sediment buildup in controls like silt fences requires immediate removal to maintain effectiveness․
Records of all inspections and maintenance activities must be meticulously kept, demonstrating compliance with regulations․ Proactive maintenance prevents larger issues, minimizing environmental impact and potential penalties․ Consistent oversight guarantees the long-term success of erosion control efforts throughout the construction process․