Here’s an overview of North Dakota guided waterfowl hunts⁚
North Dakota Guided Waterfowl Hunts⁚ An Overview
Embark on unforgettable North Dakota waterfowl hunts with experienced guides. Discover abundant ducks and geese in the heart of the Central Flyway. Guided hunts offer expertise, access to prime locations, and ensure a memorable experience.
Why Choose North Dakota for Waterfowl Hunting
North Dakota is a premier destination for waterfowl hunting, situated in the heart of the Central Flyway. The state’s numerous prairie potholes and agricultural fields provide crucial habitat for migrating ducks and geese. With liberal limits and a diverse landscape, North Dakota offers exceptional hunting opportunities. Experienced outfitters and guides enhance the experience, ensuring successful and memorable hunts. The state’s rich waterfowl heritage and abundant bird populations make it a top choice for avid hunters seeking thrilling adventures. Discover why North Dakota is a waterfowl paradise.
Prime Waterfowl Species in North Dakota
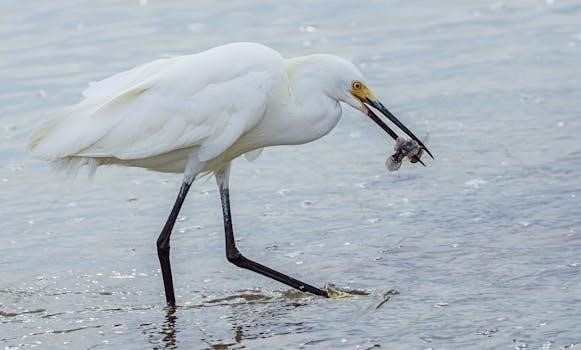
North Dakota boasts diverse waterfowl, including Mallards, Canada geese, and Snow geese. The state’s location in the Central Flyway makes it a hotspot for various duck and goose species during migration.
Ducks⁚ Mallards and More
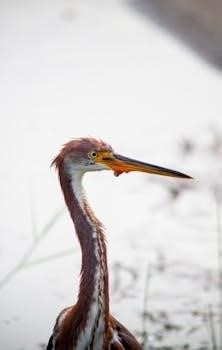
North Dakota’s duck hunting is exceptional, with robust populations thriving in diverse landscapes and ample wetlands. Hunters can target Mallards, a staple of North Dakota waterfowl hunting, alongside other species like Gadwalls, Pintails, Wigeons, and Teal. Diver duck hunts are also available. Guided hunts provide access to prime duck hunting zones, ensuring a thrilling experience for both novice and experienced hunters seeking the thrill of wings overhead.
Geese⁚ Canada and Snow Geese
North Dakota offers outstanding goose hunting opportunities, primarily targeting Canada geese and Snow geese. These species migrate through the state in large numbers, providing thrilling hunting experiences. Outfitters often conduct hunts in fields where geese feed, utilizing decoys and calls to attract flocks. Hunters can anticipate exciting hunts with the chance to harvest both Canada and Snow geese, making for a rewarding waterfowl adventure in North Dakota’s expansive landscapes.
Top Outfitters and Guide Services
Discover North Dakota’s premier waterfowl hunting outfitters. These expert guides provide exceptional hunting experiences, utilizing their knowledge of the region and bird patterns to ensure a successful and memorable hunt for all.
Dirty Bird Outfitters⁚ Swan and Combo Hunts
Dirty Bird Outfitters specializes in delivering premier guided North Dakota waterfowl hunting experiences. They offer specialized North Dakota duck hunts, North Dakota goose hunts, and unique North Dakota swan hunts. Contact Matt Piehl to book an excellent waterfowl adventure. They guide in North Dakota during October, November, and December, offering combo duck and goose hunts, diver hunts, and swan hunts. Join them and experience the state they have hunted for over 20 years. They focus on finding the birds and getting you that rush you crave.
Dakota Waterfowl Company⁚ Devils Lake Expertise
Experience ultimate North Dakota Waterfowl Hunts with Dakota Waterfowl Company in Devils Lake, North Dakota. Their expert guides ensure an unforgettable hunt in the Prairie Pothole region, known for its abundant ducks and geese. Dakota Waterfowl Company offers guided hunts in prime locations, including lodging at West Bay Resort. Perfect for groups and corporate packages. Book your trip today for a hunt of a lifetime! They will provide you with the best waterfowl experience, so come and join them.
Stone Prairie Outfitters⁚ Duck, Geese, and Deer Combo
Stone Prairie Outfitters offers guided hunting tours for duck, geese, and deer in North Dakota. These guided hunts take place in their endless fields and small bodies of water. Hunters can typically expect to shoot Canadians, Mallards, and Teal. Stone Prairie Outfitters area has some of the most exciting whitetail deer. If duck and goose hunting is your passion, Stone Prairie Outfitters is your solution! They will do their best to make your hunt a once-in-a-lifetime experience!
Winged Haven Outfitters⁚ Premier Experience
Located in the heart of the flyway, Winged Haven Outfitters prides itself on providing a world-class experience, building lifelong friendships with guests. With over 20 years of combined guide experience, they ensure guests have the best chance of success. They promise an incredible experience, putting all effort into your trip. Winged Haven Outfitters offers premier guided waterfowl hunts in North Dakota; Book a guided hunt this season and experience North Dakota’s premier waterfowl hunting destination. They’re looking forward to meeting you!
Key Hunting Locations in North Dakota
North Dakota boasts prime waterfowl hunting locations. The Devils Lake region and the Prairie Pothole Region stand out. These areas offer abundant wetlands, drawing thousands of migrating ducks and geese annually.
Devils Lake⁚ A Waterfowl Hotspot
Devils Lake in North Dakota is renowned as a premier waterfowl hunting destination. Its expansive waters and surrounding wetlands attract a significant number of migrating ducks and geese. Outfitters like Dakota Waterfowl Company offer guided hunts in this area. Hunters can expect to encounter various duck species and Canada geese. Devils Lake provides an unforgettable experience for waterfowl enthusiasts seeking thrilling expeditions in North Dakota’s heartland, offering excellent opportunities for success.
Prairie Pothole Region⁚ Abundant Wetlands
The Prairie Pothole Region in North Dakota is a haven for waterfowl, characterized by numerous wetlands and diverse habitats. This region provides crucial breeding and migratory grounds for ducks and geese. Its abundant potholes attract a high concentration of waterfowl during hunting season. Hunters can find excellent opportunities for duck and goose hunting, including mallards, Canada geese, and more. The Prairie Pothole Region is a prime location for guided hunts, ensuring a rewarding experience amidst North Dakota’s natural beauty.
What to Expect on a Guided Hunt
Guided waterfowl hunts in North Dakota offer expert assistance, strategic location selection, and comprehensive support. Expect experienced guides, well-maintained equipment, and a focus on maximizing hunting success and ensuring a safe, enjoyable experience.
Guide-to-Hunter Ratios
North Dakota waterfowl outfitters typically maintain specific guide-to-hunter ratios to ensure personalized attention and safety. These ratios often range from 1⁚4 to 1⁚8, depending on the outfitter and the type of hunt. Smaller ratios allow for more individualized instruction and assistance, while larger ratios can be more cost-effective. Outfitters prioritize safety and quality, carefully managing group sizes to optimize the hunting experience for all participants, ensuring that every hunter receives adequate support and guidance throughout their North Dakota waterfowl adventure.
Typical Daily Itinerary
A typical day on a guided North Dakota waterfowl hunt starts before dawn. Hunters gather for a pre-hunt briefing and head to the designated hunting location. Decoys are set up, and blinds are prepared. As the sun rises, the hunt begins, targeting ducks and geese as they fly. Mid-morning involves continued hunting, followed by a break for lunch. The afternoon may include more hunting or scouting for the next day. The day concludes with returning to the lodge for dinner and relaxation, with stories of the day’s hunt.
Essential Gear and Licensing Requirements
Prepare for your North Dakota waterfowl hunt by understanding essential gear and licensing requirements. Ensure you have the necessary permits, appropriate clothing, and reliable equipment for a successful and legal hunting experience.
Required Licenses and Permits
To legally participate in North Dakota waterfowl hunts, hunters must acquire the appropriate licenses and permits. This typically includes a general North Dakota hunting license, a waterfowl license, and a federal duck stamp. Depending on the specific species targeted, additional permits, such as a swan permit, may also be necessary. Regulations can change, so confirm current requirements with the North Dakota Game and Fish Department before your hunt to ensure compliance and avoid potential fines.
Recommended Hunting Equipment
Successful North Dakota waterfowl hunts require appropriate gear; A 12-gauge shotgun is a popular choice. Non-toxic shotshells are mandatory. Camouflage clothing suitable for varying weather conditions is crucial. Waders or waterproof boots are essential for navigating wetlands. Decoys and calls are important for attracting waterfowl. Binoculars aid in spotting distant birds; A reliable blind provides concealment. Don’t forget eye and ear protection for safety. Finally, a hunting dog can significantly enhance the retrieval of downed birds, making it a valuable asset during the hunt.
Here’s some text about lodging options⁚
Lodging Options and Amenities
After a day of waterfowl hunting, relax in comfortable North Dakota lodging. Options range from cozy lodges to resorts, offering amenities like meals, Wi-Fi, and convenient access to hunting areas.
Here’s some text about West Bay Resort⁚
West Bay Resort⁚ Accommodation Packages
West Bay Resort, near Devils Lake, offers premier accommodation packages tailored for waterfowl hunters. These packages often include comfortable lodging, meals, and convenient access to prime hunting locations; Partnering with Dakota Waterfowl Company, West Bay provides a seamless hunting experience. Enjoy modern amenities, ensuring a relaxing stay after a successful day in the field. Look for packages that combine lodging with guided hunt options for an all-inclusive North Dakota adventure. The resort aims to cater to groups and individual hunters alike.
Here’s some text about Lodge Accommodations⁚
Lodge Accommodations
Numerous outfitters in North Dakota provide lodge accommodations as part of their waterfowl hunting packages. These lodges range from rustic, hunter-focused setups to more modern facilities with enhanced amenities. Lodges often include meals, comfortable sleeping arrangements, and common areas for socializing. Baldhill Creek Adventures and Ringneck Resort are examples offering lodging. Staying in a lodge provides convenience, allowing hunters to focus on the hunt. Ensure the lodge meets your needs regarding comfort, location, and included services for an enjoyable trip.
Here is text for booking your North Dakota Waterfowl Hunt⁚
Booking Your North Dakota Waterfowl Hunt
Ready for a North Dakota waterfowl adventure? Booking in advance ensures availability with top outfitters. Contact them directly to discuss dates, packages, and specific hunting preferences for an unforgettable experience.
Here’s the generated text for the ‘Best Time to Book’ subheading⁚
Best Time to Book
To secure your spot for a guided waterfowl hunt in North Dakota, early booking is highly recommended. Prime hunting dates, particularly during peak migration in October and November, fill up quickly. Outfitters often have limited availability, and booking well in advance, ideally several months prior to your desired hunt dates, ensures you have the best chance of securing your preferred dates and accommodations. Contact outfitters early to discuss options and plan your trip.
Here’s the generated text for the ‘Contact Information for Outfitters’ subheading⁚
Contact Information for Outfitters
To book your North Dakota waterfowl hunting adventure, reach out to the outfitters directly. Contact Dirty Bird Outfitters’ Matt Piehl at 701-290-6582 or email matt@dirtybirdoutfitters.com. Explore options with Dakota Waterfowl Company through their website or provided contact details. For Winged Haven Outfitters, visit their website for booking information. Stone Prairie Outfitters can be contacted via their website. Mouse River Outfitters can be found online. Baldhill Creek Adventures is another option. These direct contacts ensure personalized planning.